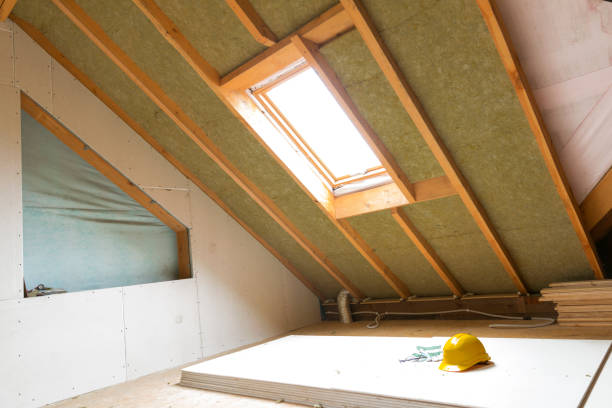
Roof insulation is one of the most important aspects of home maintenance. It ensures that your home remains comfortable, energy-efficient, and protected from the elements.
Whether you’re building a new home or upgrading an existing one, properly insulating your roof can save you money on energy bills and reduce your environmental footprint.
In this guide, we’ll walk you through how to insulate your roof effectively and why it’s crucial for your home.
Why Roof Insulation Matters
Before we discuss the how, let’s discuss the why. Proper roof insulation helps regulate the temperature inside your home by preventing heat from escaping during winter and keeping cool air in during summer. This means you can enjoy a comfortable living space year-round while reducing your reliance on heating and cooling systems.
Without adequate insulation, you may experience fluctuating indoor temperatures, which can lead to higher energy costs and increased wear on your HVAC systems. So, roof insulation is a great place to start, whether you’re looking to enhance your home’s energy efficiency or make it more eco-friendly.
Types of Roof Insulation
Several types of roof insulation materials are available, each with its own advantages. Understanding which type suits your needs is the first step toward adequately insulating your roof.
1. Batt Insulation
Batt insulation, a common type made from fibreglass or mineral wool, is a financially savvy choice. It’s relatively easy to install and is cut to fit snugly between roof beams and joists. While it’s cost-effective, it’s crucial to ensure there are no gaps where heat can escape.
2. Spray Foam Insulation
Spray foam insulation is ideal for sealing hard-to-reach areas and creating an airtight barrier. This material expands on contact, filling every nook and cranny of your roof space, making it a great choice for uneven surfaces. Spray foam provides excellent thermal resistance but can be more expensive than other options.
3. Loose-Fill Insulation
Loose-fill insulation, often made from recycled materials like cellulose or fibreglass, is blown into roof cavities using special equipment. It’s perfect for insulating hard-to-access areas or adding an extra insulation layer to an existing one.
4. Rigid Foam Insulation
Rigid foam insulation boards are cut to size and placed between the rafters or on top of the roof structure. This type of insulation offers high thermal resistance and is a popular choice for new builds. It’s slightly more labour-intensive but provides excellent results in terms of both energy efficiency and longevity.
Steps to Properly Insulate a Roof
Now that you know the different roof insulation types, let’s learn how to install it properly. The process involves assessing your current insulation, choosing the right material, sealing any gaps or leaks, installing the insulation, adding a vapour barrier if necessary, and ensuring adequate ventilation. We’ll walk you through each step in detail.
1. Assess Your Roof’s Current Insulation
Before adding any new insulation, it’s important to evaluate the condition of your roof’s existing insulation. If there are signs of damage, such as dampness, mould, or gaps, you’ll need to address these issues before proceeding. Damaged insulation won’t perform effectively and could lead to bigger problems down the line.
2. Choose the Right Insulation Material
Depending on your roof’s structure, budget, and energy goals, you’ll need to select the appropriate insulation material. For example, batt insulation might be the way to go if you’re looking for an affordable and DIY-friendly option. On the other hand, if you want maximum energy efficiency, spray foam insulation could be a better fit.
3. Seal Any Gaps or Leaks
Before laying down insulation, seal any gaps or cracks in the roof structure. This ensures that your insulation performs at its best and prevents drafts from entering your home. Use caulk or foam sealant to close small gaps and address roof leaks before proceeding.
4. Install the Insulation
Now, it’s time to install your chosen insulation material. If you’re working with batt insulation, cut it precisely to fit between the roof beams, ensuring no gaps. For spray foam or loose-fill insulation, hiring a professional to ensure an even application is a good idea. If you use rigid foam boards, secure them tightly to prevent movement or gaps.
5. Add a Vapour Barrier (Optional)
In some climates, adding a vapour barrier between the insulation and the roof can help prevent condensation and moisture build-up, which can lead to mould growth. This step is critical if you live in a humid area.
6. Check for Adequate Ventilation
Lastly, ensure your roof has proper ventilation. While insulation helps keep your home warm or cool, ventilation prevents moisture from getting trapped and causing damage. A well-ventilated roof will improve the longevity of your insulation and roof structure.
Proper roof insulation is critical to maintaining a comfortable, energy-efficient home. By choosing the suitable insulation material and following the steps outlined above, you can ensure your roof is well-prepared to protect you from the elements.
The benefits of a well-insulated roof are numerous, from lower energy bills to a more comfortable living environment. Don’t delay-start your insulation project today and start enjoying these benefits!
If you’re unsure where to start or need expert advice, contact Waterproofing Direct. Our team can guide you through the process, ensuring your roof is adequately insulated for maximum comfort and savings.
With their expertise, you can avoid common pitfalls and ensure the job is done right the first time. Don’t wait – reach out today and take the first step toward a better-insulated home!

