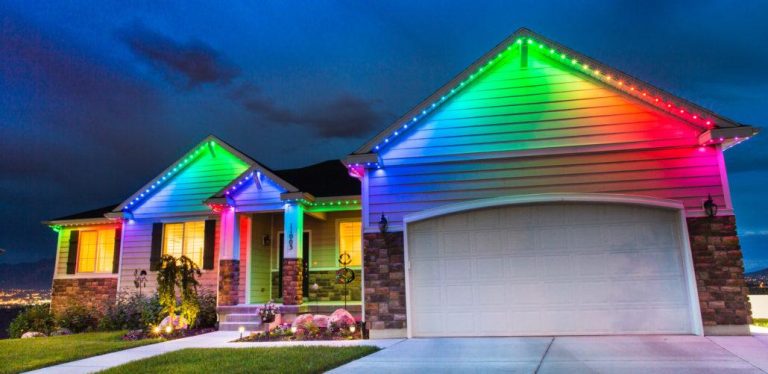
Neon strip lights have become a popular choice for adding vibrant and eye-catching lighting effects to residential spaces. With advancements in LED technology, it is now possible to create addressable neon LED light strips that offer even more flexibility and control over lighting patterns and effects.
In this article, we will guide you through the process of making addressable neon LED light strips for your house. We will cover the necessary materials, step-by-step instructions, and key considerations for creating stunning and customizable lighting displays.
I. Understanding Addressable Neon LED Strip Lights:
Addressable neon LED strip lights are a type of LED lighting that can be individually controlled and programmed to display various colors and patterns.
Unlike traditional neon lights, which use gas-filled tubes, these LED strips are flexible and can be easily installed in different shapes and sizes. The addressable feature allows you to control each LED separately, enabling dynamic lighting effects that can be synchronized with music or other external inputs.
II. Essential Materials and Tools:
Before getting started, gather the following materials: addressable neon LED strip lights, a power supply, an Arduino broad or other SPI micro led controller, jumper wires, a breadboard, adhesive or mounting clips, and optionally, a diffuser or silicone profile. These materials will ensure proper functioning and provide options for customization and installation.
III. Step-by-Step Guide to Making Addressable Neon LED Light Strips:
Planning the Layout: Measure the dimensions of the area where you want to install the addressable neon LED light strips. Consider the desired lighting effects, such as outlining architectural features or creating dynamic color-changing effects.
Preparing the Power Supply: Connect the power supply to the microcontroller, ensuring the correct voltage and current requirements are met. Follow the manufacturer’s instructions for proper wiring and safety precautions.
Cutting and Connecting the LED Strips: Cut the addressable neon LED strip lights to the desired lengths, making sure to follow the designated cutting lines. Use jumper wires to connect the LED strips to the microcontroller, following the pinout instructions provided. Secure the connections using soldering or connectors.
Coding the Microcontroller: Write or upload the appropriate code to the microcontroller that will control the addressable LED strips. Use libraries and examples available for addressable LED strip programming. Customize the code to create desired lighting patterns, color transitions, and effects.
Testing the Setup: Upload the code to the microcontroller and test the LED strips to ensure they are functioning correctly. Troubleshoot any issues with the wiring or code. Make any necessary adjustments to achieve the desired lighting effects.
Mounting the LED Strips: Use adhesive or mounting clips to secure the addressable neon LED light strips in the planned installation locations. Ensure the strips are firmly attached and positioned correctly for the desired lighting effects.
Powering Up and Control: Connect the power supply to the addressable LED strips and plug it into a suitable electrical outlet. Test the control of the LEDs using the programmed microcontroller. Experiment with different lighting patterns, colors, and effects.
Customization Options: Enhance the appearance of the LED light strips by using diffusers or silicone profiles to achieve a more uniform and diffused lighting effect. These accessories can also provide protection and longevity to the LED strips.
IV. Overview of Benefits and Applications:
Addressable led neon strip lights offer numerous benefits over traditional neon lights. The ability to individually control and program each LED allows for dynamic color changes, patterns, and animations.
These LED strips are energy-efficient, long-lasting, and offer compatibility with various control systems. They can be used indoors and outdoors to create stunning lighting displays in residential spaces, such as accentuating architectural details, highlighting outdoor landscapes, or transforming interiors with ambient lighting effects.
V. Safety and Precautions:
When working with addressable neon LED light strips, always prioritize safety. Ensure the power supply, wiring, and connections are secure and adhere to the manufacturer’s specifications. Follow safe electrical practices when handling and installing the LED strips. If in doubt, consult a professional electrician.
Conclusion:
Creating addressable neon LED light strips for your house can transform your living space with vibrant and customizable lighting effects. By following the step-by-step guide outlined in this article, you can design and implement your own mesmerizing lighting displays. From accentuating architectural features to setting the perfect ambiance, addressable neon LED light strips offer endless possibilities for adding a touch of brilliance to your home.
Disclaimer: The information provided in this article is based on general knowledge and research. It is recommended to refer to manufacturer instructions and consult professionals when working with electrical components.

